![]()
Optimizely (previously known as Episerver) CMS is a powerful content management system that empowers developers to effortlessly build and manage dynamic websites. In this blog series, we’ll explore the various features of Optimizely CMS in detail. But for now, let’s concentrate on Part-1 - The step-by-step guide to creating a sample Optimizely CMS website using the Episerver CMS Visual Studio extensions.
Table of contents
Open Table of contents
Developer prerequisites
To excel in your Optimizely development projects, it’s important to possess a solid grasp of the following domains:
HTMLandCSSASP.NET Coreand &C#- A good IDE like Microsoft Visual Studio or Visual Studio Code
- Microsoft SQL Server
- Install Visual Studio extensions for Episerver CMS
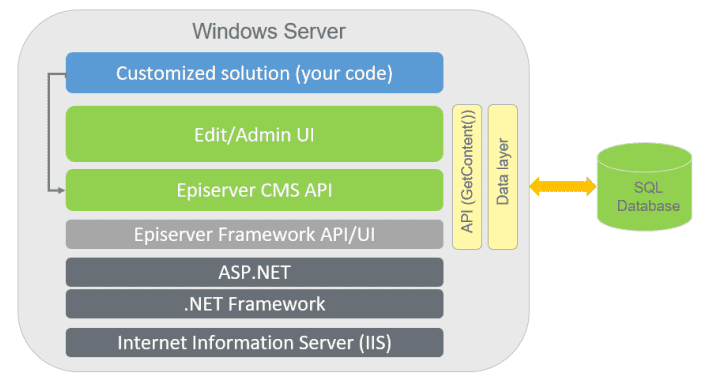
Optimizely’s Content Management System (CMS) utilizes Microsoft technology and ASP.NET Core for web development. It stores data in the SQL Server database and employs a framework API for multiple products in the Optimizely platform.
Step by step guide
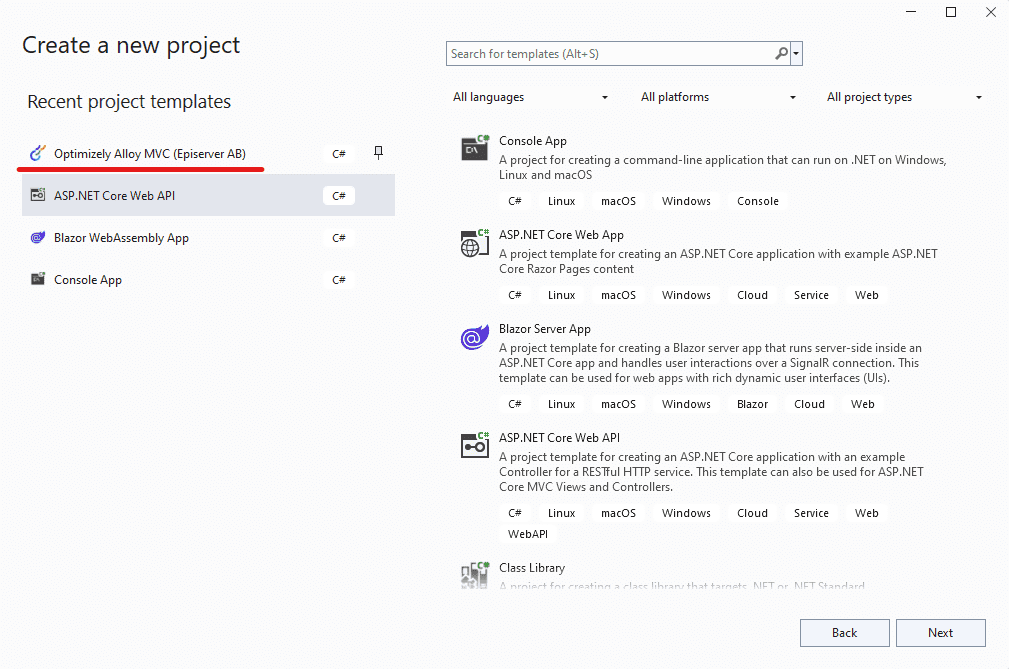
- Launch Visual Studio and choose “Create New Project.”
- After installing the Visual Studio extensions for Episerver CMS , you will be able to select the sample template “Optimizely Alloy MVC (Episerver AB)” and proceed by clicking “Next.”
- Provide an appropriate project name and target location, then select “Next” and click on “Create.”
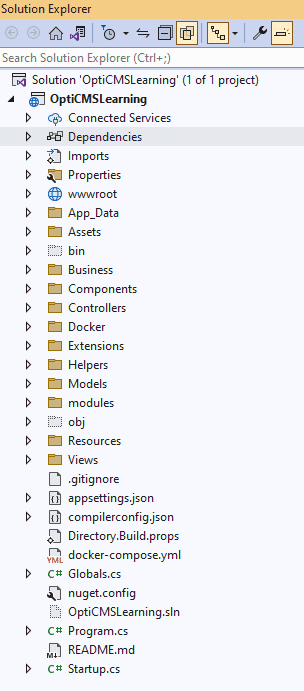
- After the project is successfully created, you can observe the default structure of the Optimizely CMS template in the Solution Explorer.
- The
App_Datafolder stores database files and blobs that hold media files. - Within the Business folder, you’ll find the business logic and extension methods.
- The Models folder houses content models within the CMS database.
- The Components folder contains CMS component data models.
- The Controllers and Views folder offers CMS templates.
- The Module folder includes shell models and any installed add-ons.
- Please review the
appsettings.development.configfile for the database connection string and default CMS mapped roles.
- The
- Run the project in Run without Debugging mode(Ctrl + F5)
- You will be prompted to register inital user credentials. Enter username, password & click register.
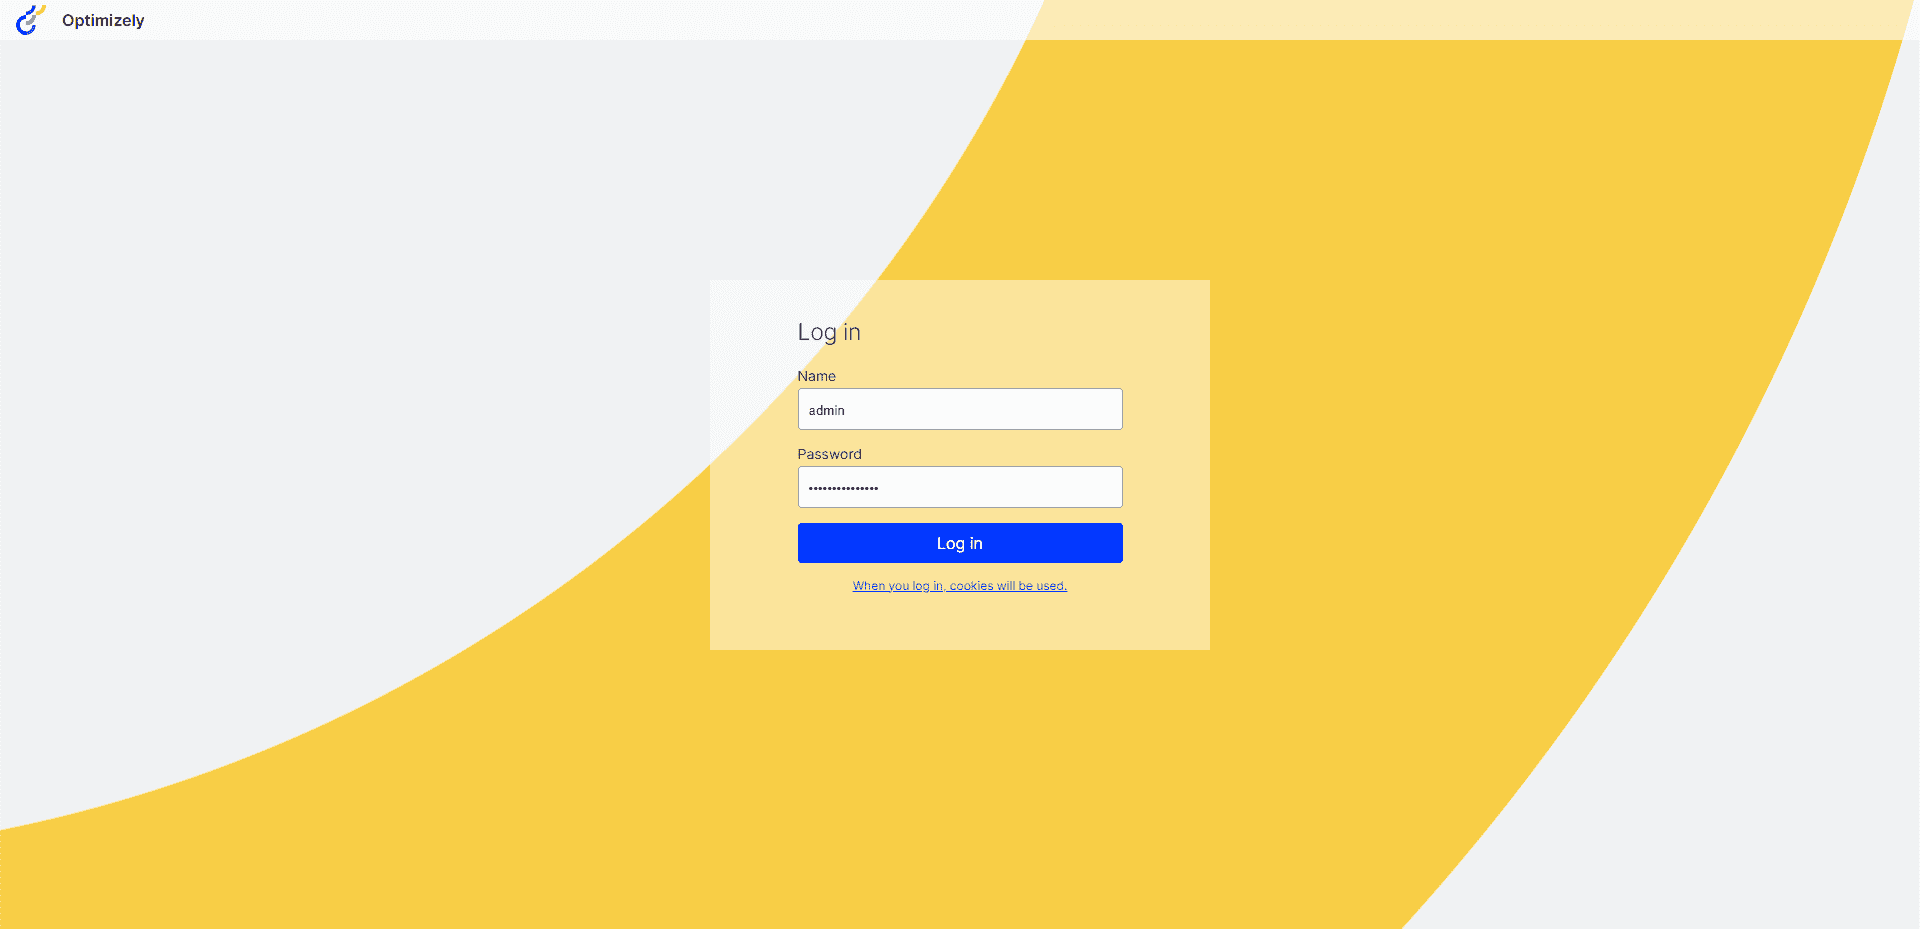
- The default website of the Optimizely CMS will now be visible and operational.
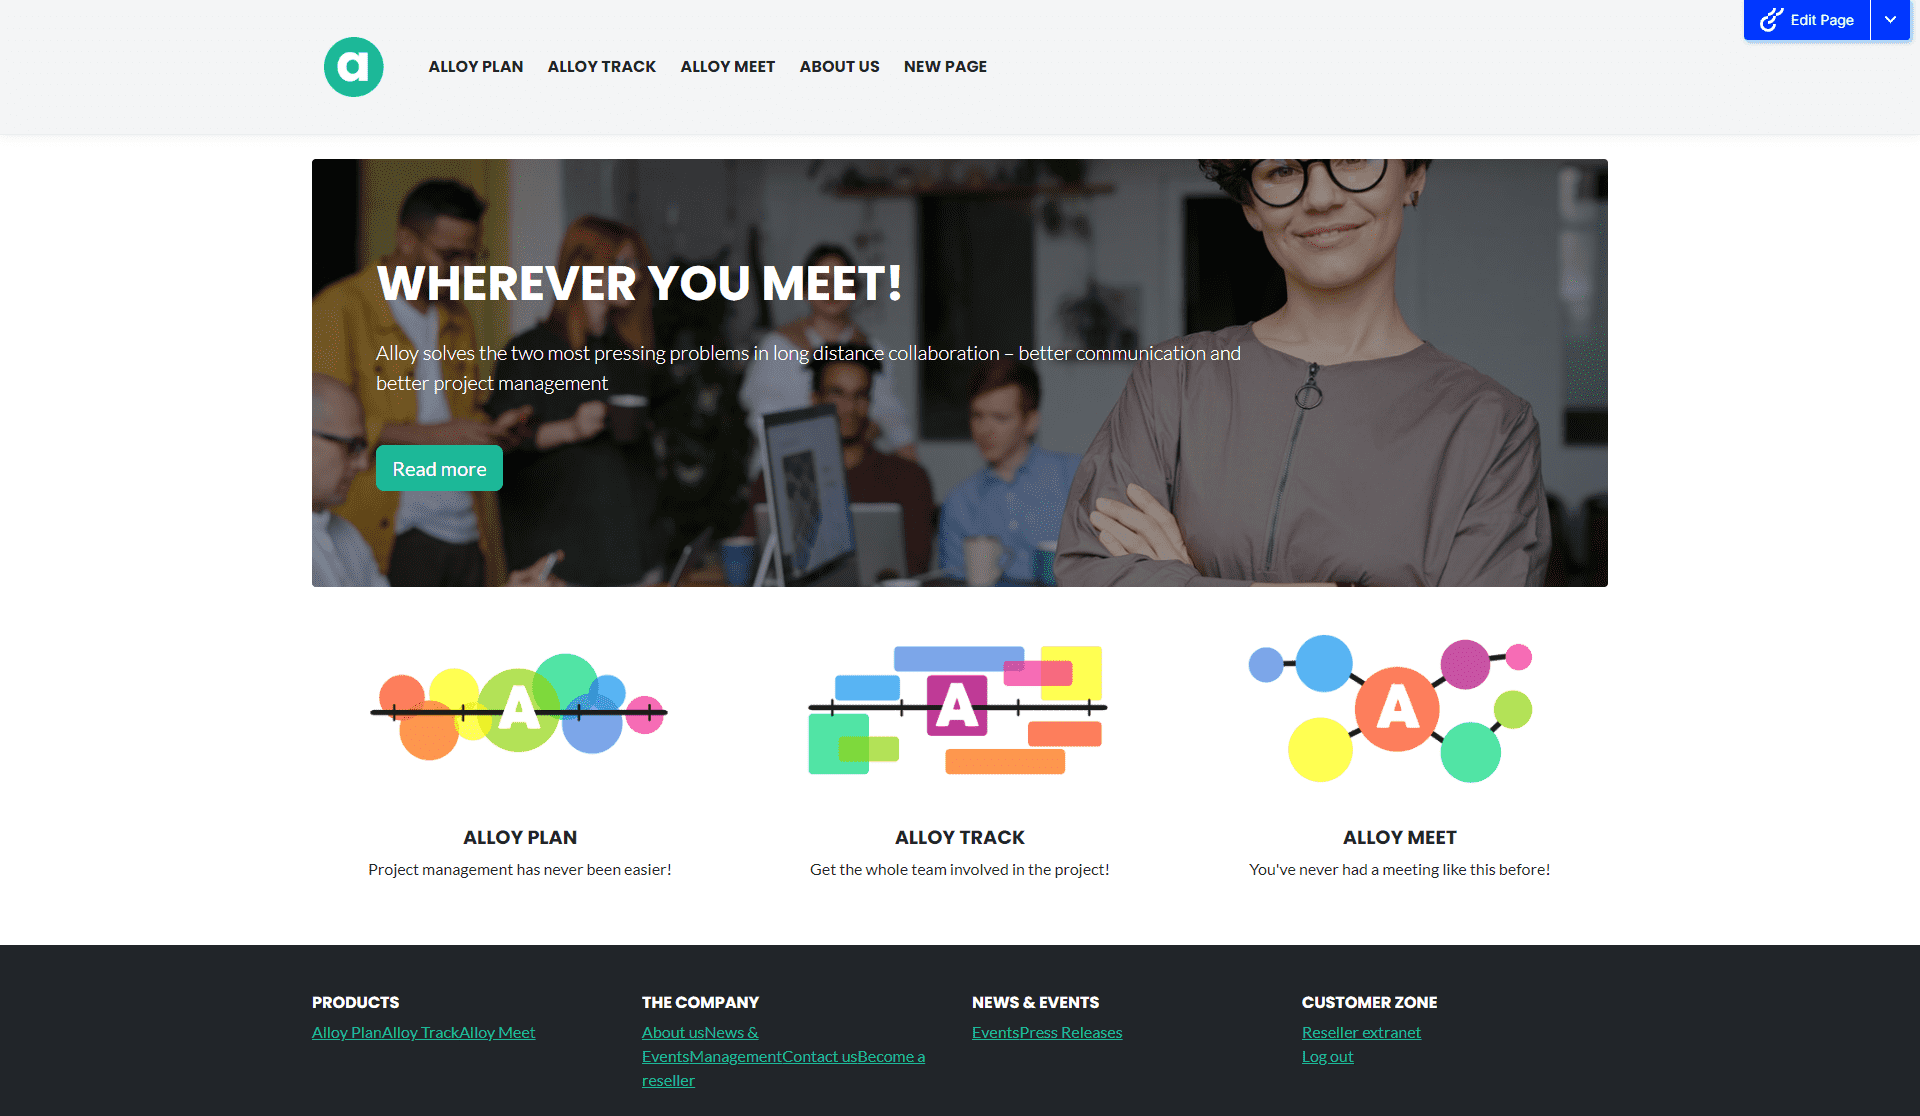
- After logging in, the Blue Edit CMS button will be visible in the right corner. Click on it to access the CMS edit mode. On the left, you will find the page tree, and on the right, you will see the content editor.
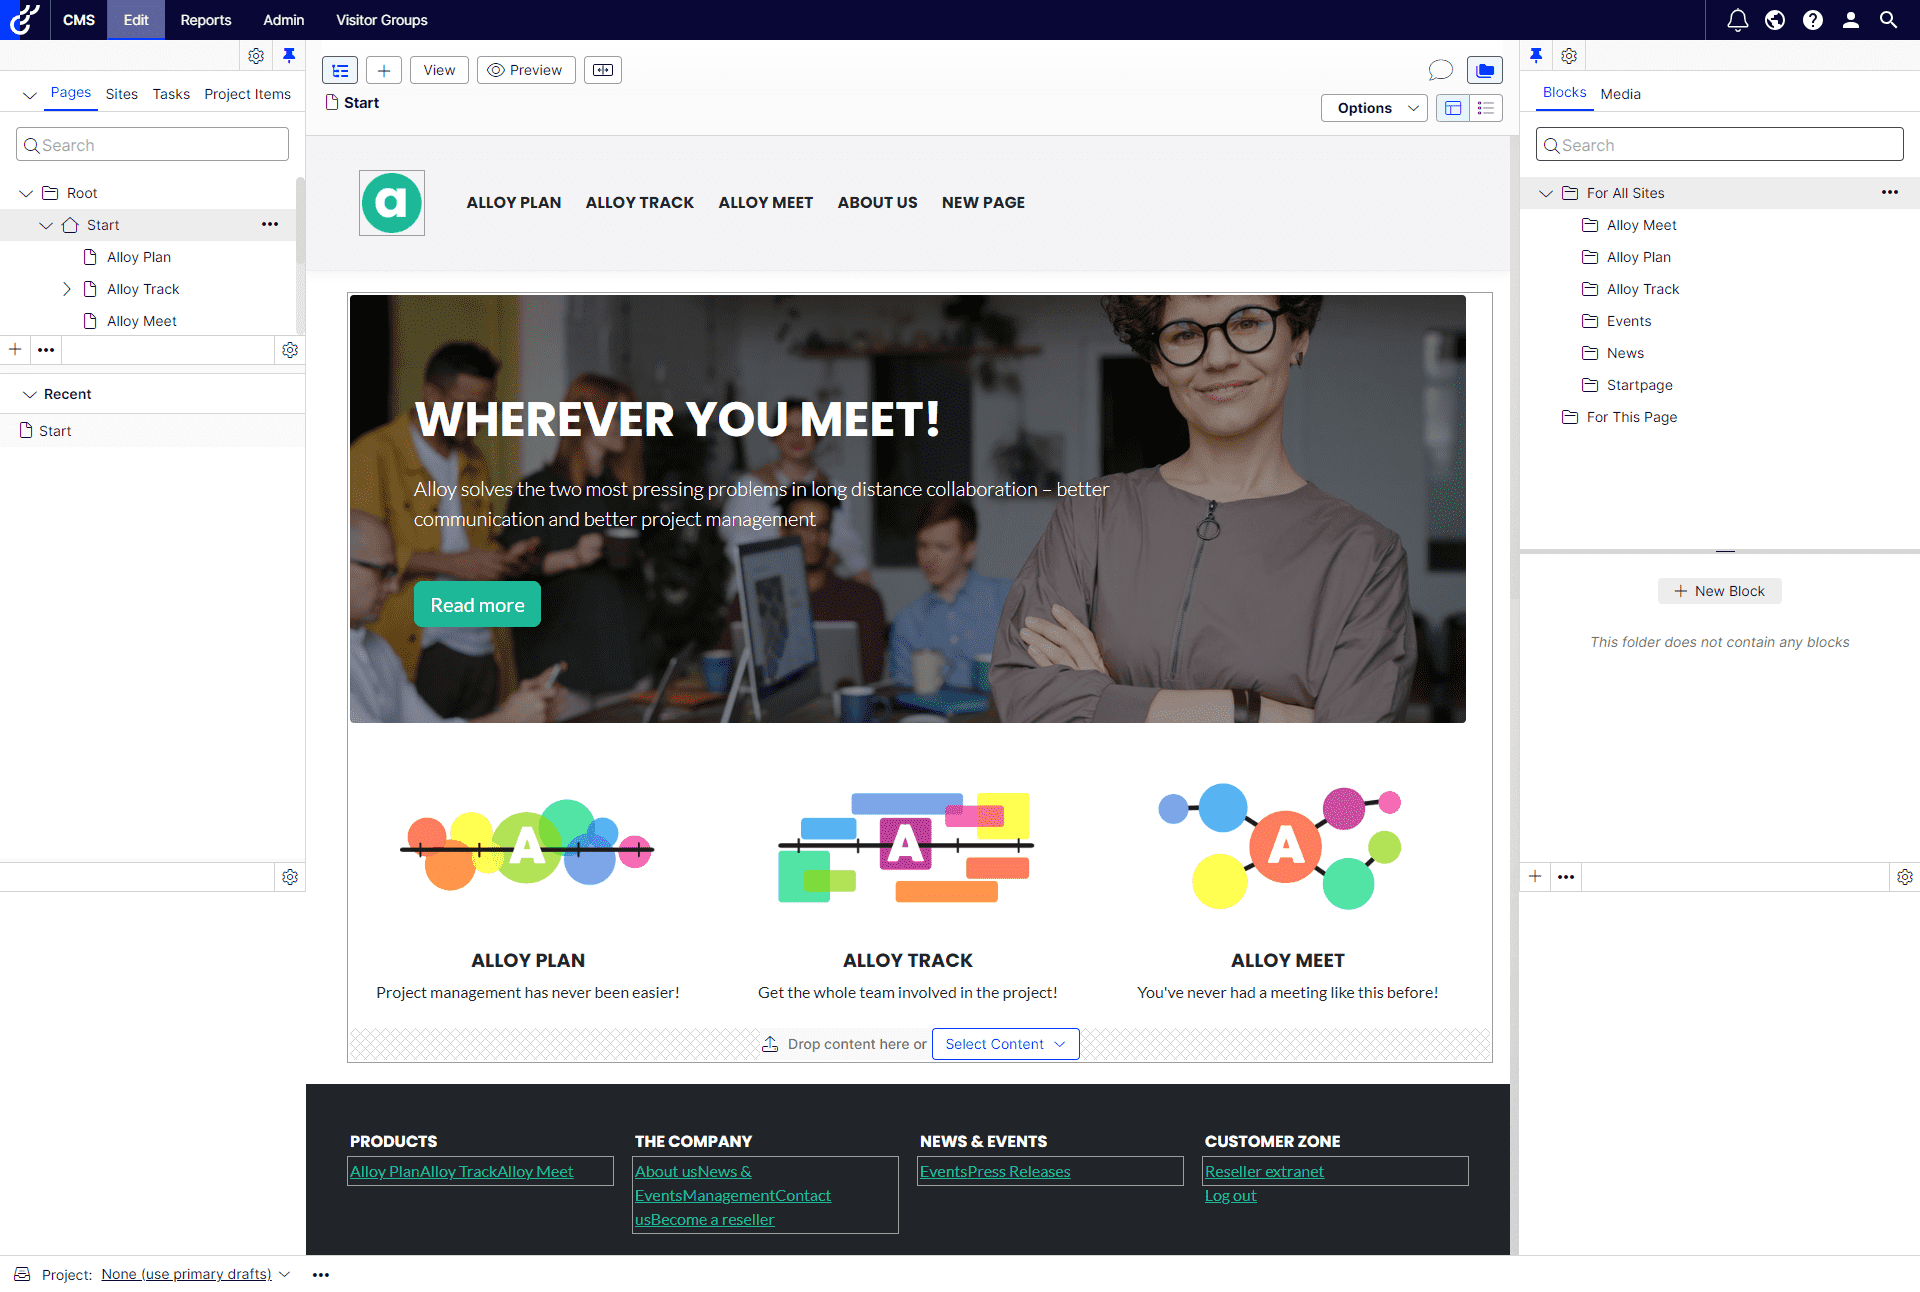
- Take note of the content area outlined in blue and the components positioned within the pages. Modify the content as needed, and it will be automatically saved. When you make content updates, a Publish option will appear. Click the preview button to see a preview of the website changes. You can also publish the changes and click “View” on the website.
- Discover the different panels in the CMS editor that correspond to functionalities such as Recent items, media, blocks, etc.
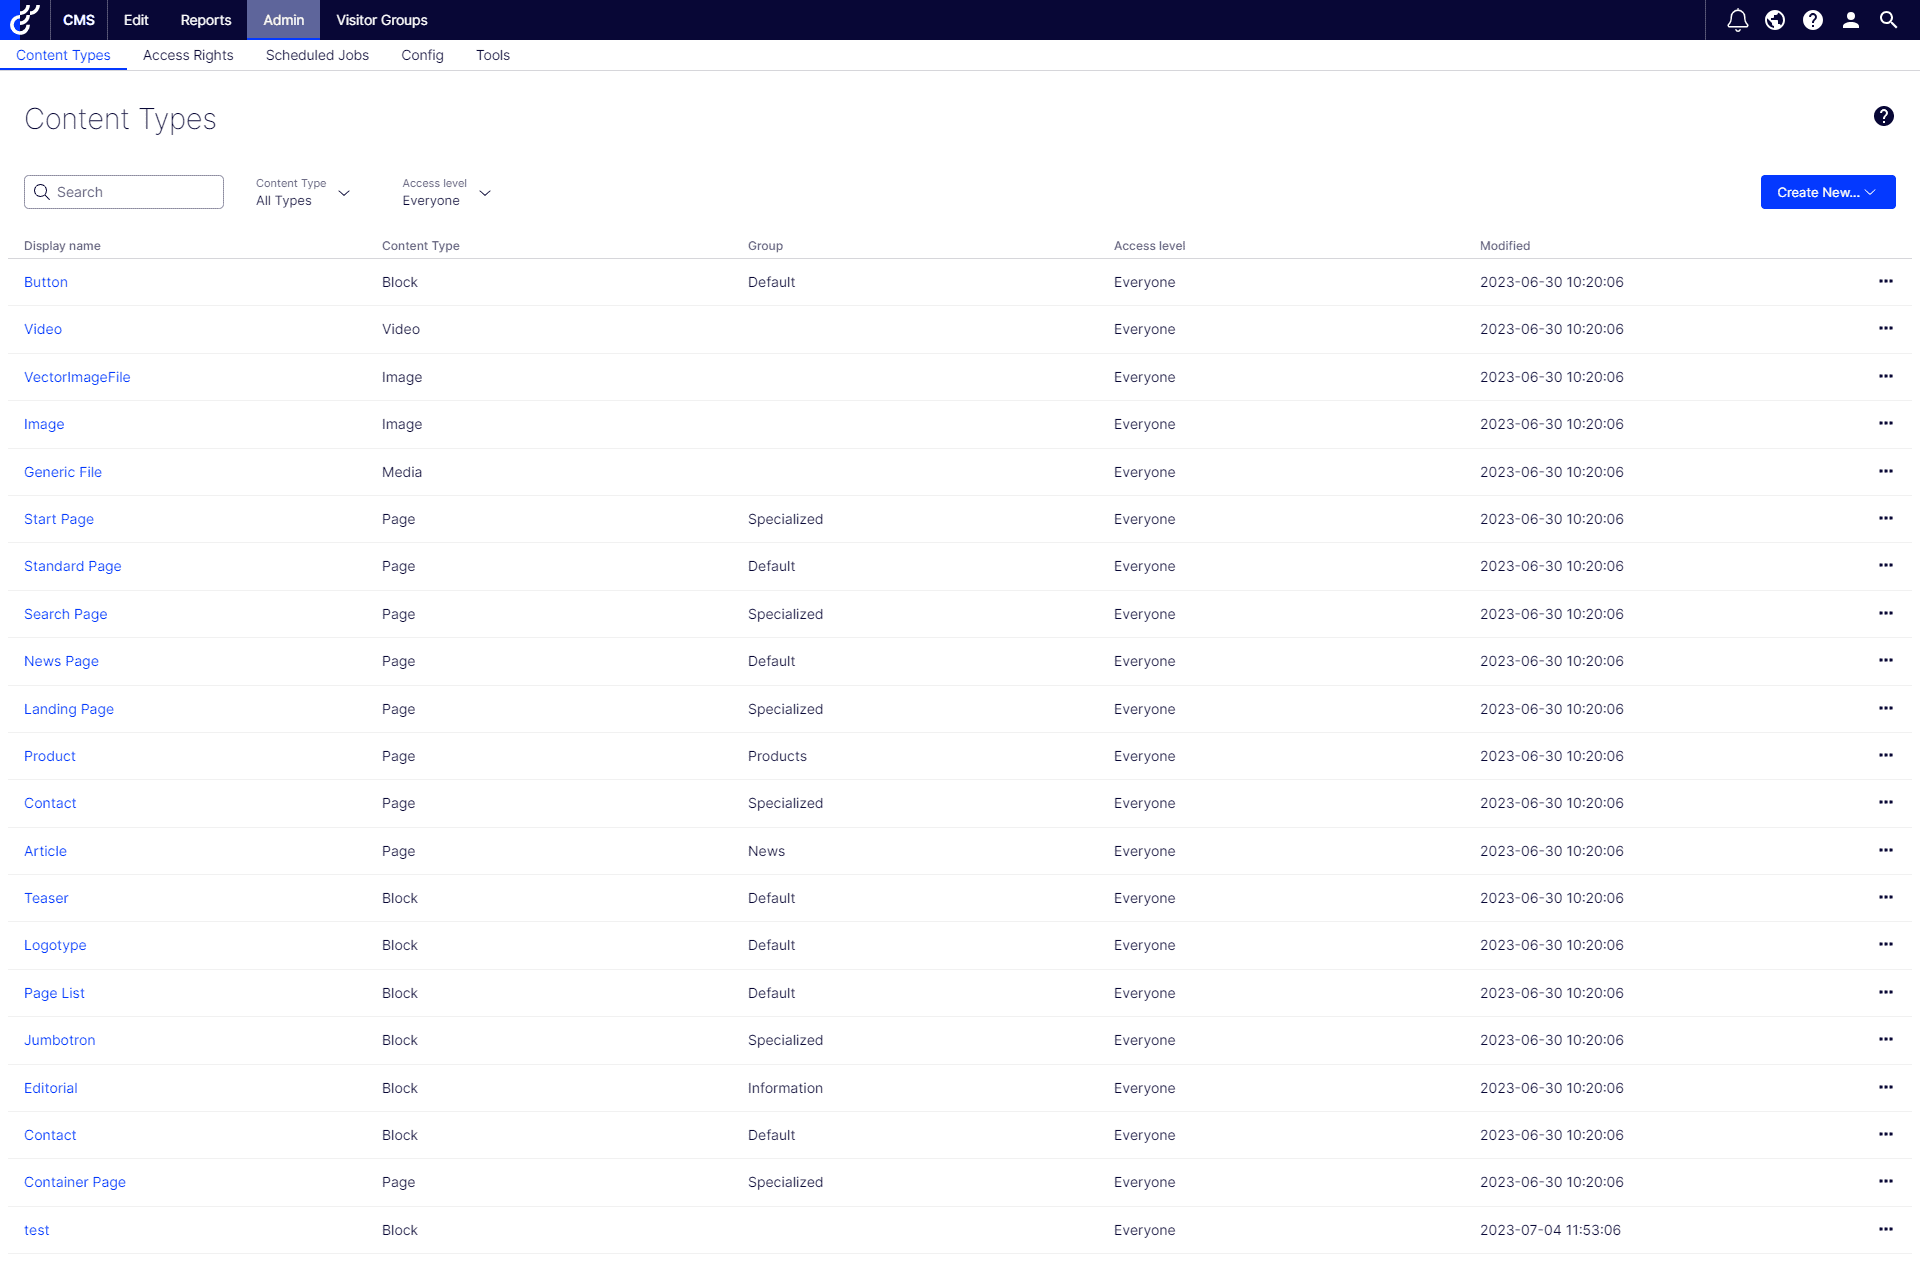
- Go to the Admin section to access the different Content Types configured in the CMS.
Conclusion
Congratulations! You have successfully completed the step-by-step guide to getting started with Optimizely CMS. By now, you should have a good understanding of how to create a sample Optimizely CMS website and explore its features. In the next episode, we will delve deeper into the CMS’s top navigational features.
For more detailed information and advanced features, please refer to the official Episerver documentation at https://docs.developers.optimizely.com/
Good luck, and keep Learning!!